2021. 11. 22. 20:07ㆍSpring/Boot
이전 글에 이어서 본격적으로 OAuth 기능을 구현해보자. 먼저 Github OAuth Api를 확인하자.
https://docs.github.com/en/developers/apps/building-oauth-apps/authorizing-oauth-apps
Authorizing OAuth Apps - GitHub Docs
GitHub's OAuth implementation supports the standard authorization code grant type and the OAuth 2.0 Device Authorization Grant for apps that don't have access to a web browser. If you want to skip authorizing your app in the standard way, such as when test
docs.github.com
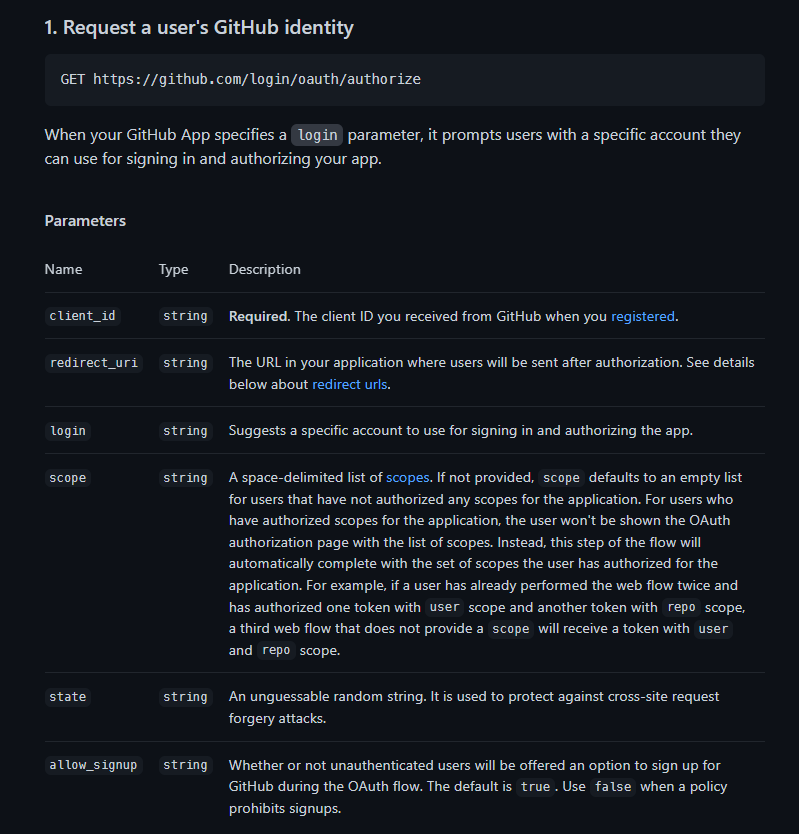
먼저 GET 방식으로 위 링크와 파라미터로 여러 값을 넘겨주어야 한다고 써있다. 우리는 여기서 간단하게 client_id와 redirect_uri만 넣어줄 것이다. 특정 권한이나 다른 옵션 등은 필요에 따라 넣어주면 된다.
client id와 redirect_uri는 우리가 만들었던 OAuth Apps에서 찾을 수 있다.
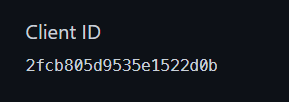
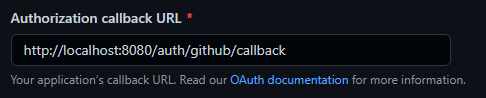
위 두 값을 바탕으로 resources/template/ 아래에 index.html을 작성하자.
<!DOCTYPE html>
<html lang="en">
<head>
    <meta charset="UTF-8">
    <title>Title</title>
</head>
<body>
<a href="https://github.com/login/oauth/authorize?client_id=2fcb805d9535e1522d0b&redirect_uri=http://localhost:8080/auth/github/callback">
    Github Login</a>
</body>
</html>
그리고 이에 대해 컨트롤러를 작성하자.
package com.example.githubapi;

import org.springframework.stereotype.Controller;
import org.springframework.web.bind.annotation.GetMapping;

@Controller
public class HomeController {

    @GetMapping("/")
    public String home() {
        return "index";
    }
}
이렇게 만들어진 페이지를 확인해보자.
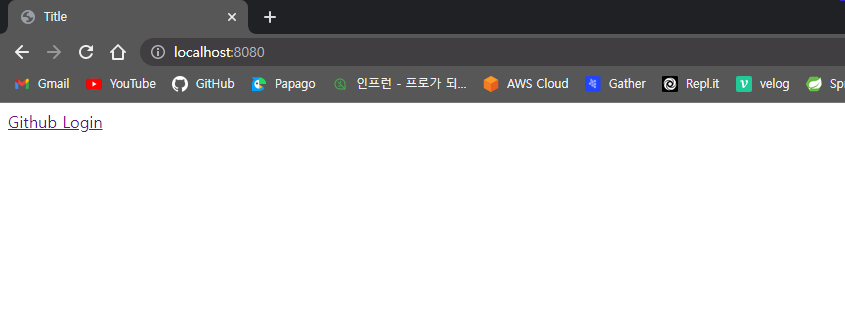
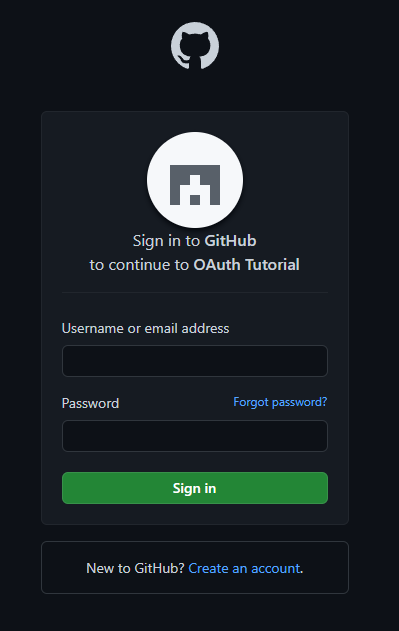
이제 이 링크를 클릭하면 깃허브 서버에 우리 서비스에 권한을 부여해도 되는지에 대한 확인을 한다. 아래 화면과 같이 로그인 화면이 나온다. 로그인하자. 로그인이 되어있다면 바로 다음 페이지가 나올 것이다.
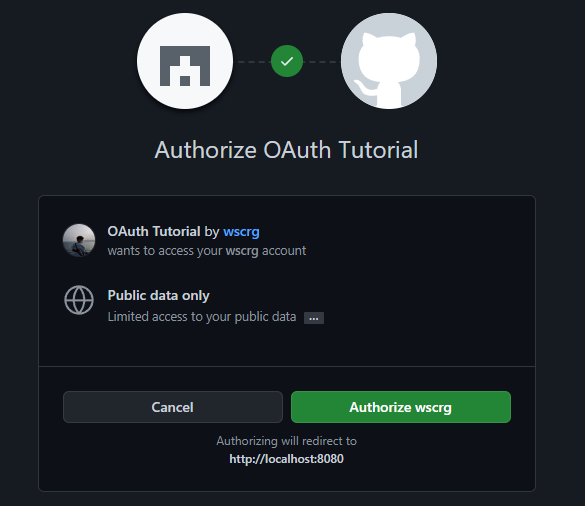
로그인을 하면 아래와 같이 Authorize를 할 권한과 서비스에 권한 부여를 할지를 물어본다. Authorize를 누르자.
승인을 누르면 아래와 같이 Whitelabel Error Page가 나온다. 이때 URL을 확인해보면 우리가 아까 redirect_uri에 넣어준 URL 뒤로 code가 붙어서 왔다. 이 값이 우리가 다음에 사용할 값이다. 이제 첫 번째 단계가 끝났다.

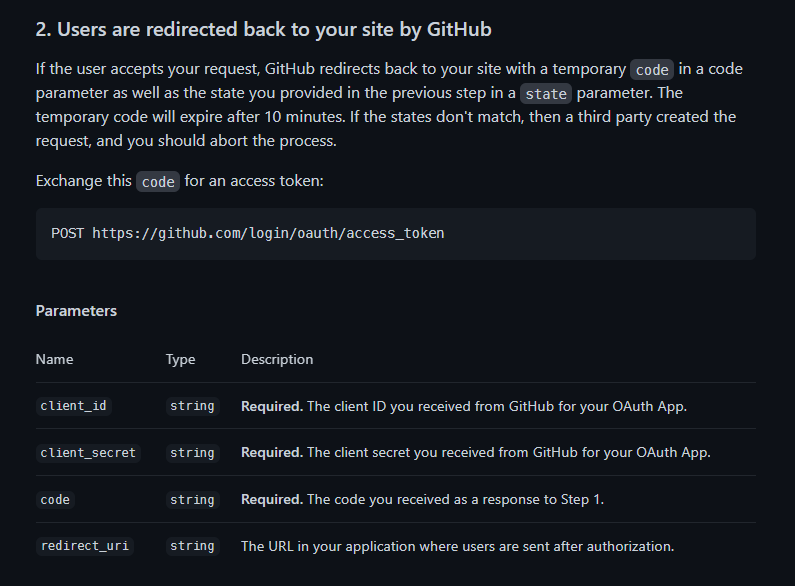
이제 두 번째 단계를 확인하자. 여기서는 POST 방식으로 아래 링크에 파라미터로 client_id, client_secret, code 값이 필수로 되어있다. 이 단계를 성공하면 우리 깃허브 계정에 대해 접근할 수 있는 access token이 발행된다.
이제 2단계를 수행할 GithubApiController를 작성하자.
package com.example.githubapi;

import org.springframework.stereotype.Controller;
import org.springframework.web.bind.annotation.GetMapping;
import org.springframework.web.bind.annotation.RequestParam;
import org.springframework.web.servlet.mvc.support.RedirectAttributes;

import java.io.*;
import java.net.HttpURLConnection;
import java.net.URL;

@Controller
public class GithubApiController {

    @GetMapping("/auth/github/callback")
    public String getCode(@RequestParam String code) throws IOException {

        URL url = new URL("https://github.com/login/oauth/access_token");

        HttpURLConnection conn = (HttpURLConnection) url.openConnection();
        conn.setDoInput(true);
        conn.setDoOutput(true);
        conn.setRequestMethod("POST");
        conn.setRequestProperty("Accept", "application/json");
        conn.setRequestProperty("User-Agent", "Mozilla/5.0 (Windows NT 10.0; Win64; x64) AppleWebKit/537.36 (KHTML, like Gecko) Chrome/96.0.4664.45 Safari/537.36");

        // 이 부분에 client_id, client_secret, code를 넣어주자.
        // 여기서 사용한 secret 값은 사용 후 바로 삭제하였다.
        // 실제 서비스나 깃허브에 올릴 때 이 부분은 항상 주의하자.
        try (BufferedWriter bw = new BufferedWriter(new OutputStreamWriter(conn.getOutputStream()))) {
            bw.write("client_id=2fcb805d9535e1522d0b&client_secret=4395759df572eee27279148fa1a44c096bee1259&code=" + code);
            bw.flush();
        }

        int responseCode = conn.getResponseCode();

        String responseData = getResponse(conn, responseCode);

        conn.disconnect();

        System.out.println(responseData);
        return "index";
    }

    private String getResponse(HttpURLConnection conn, int responseCode) throws IOException {
        StringBuilder sb = new StringBuilder();
        if (responseCode == 200) {
            try (InputStream is = conn.getInputStream();
                 BufferedReader br = new BufferedReader(new InputStreamReader(is))) {
                for (String line = br.readLine(); line != null; line = br.readLine()) {
                    sb.append(line);
                }
            }
        }
        return sb.toString();
    }
}
이렇게 작성한 후에 다시 Github Login 링크를 클릭하면 로그에 다음과 같이 access token이 발급되어 전송받은 것을 확인할 수 있다. 이 토큰 또한 절대 노출되어서는 안된다.

이 access token을 가지고 서버에 계정 정보를 요청하면 된다. 이제 거의 다 왔다. 유저 정보에 접근하는 방법을 확인하자.
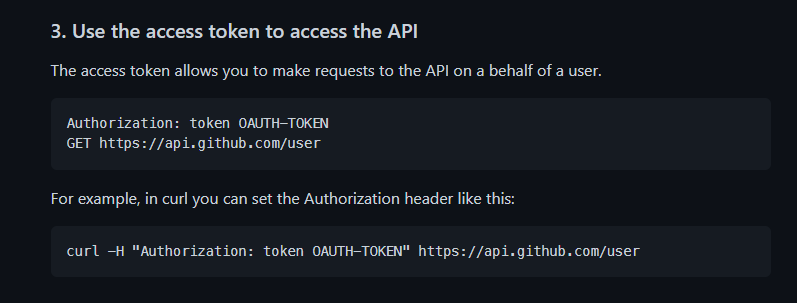
GET 방식으로 위 링크에 헤더로 Authorization 값을 위와 같이 설정해주면 된다고 한다.
Authorization: token gho_vo9----- 이런 식으로 작성하면 된다는 것이다. 이를 코드로 구현하자. GithubApiController에 메서드를 추가한 아래 코드를 작성하자.
package com.example.githubapi;

import com.fasterxml.jackson.core.JsonProcessingException;
import com.fasterxml.jackson.databind.ObjectMapper;
import org.springframework.stereotype.Controller;
import org.springframework.ui.Model;
import org.springframework.web.bind.annotation.GetMapping;
import org.springframework.web.bind.annotation.RequestParam;
import org.springframework.web.servlet.mvc.support.RedirectAttributes;
import org.springframework.web.servlet.support.RequestContextUtils;

import javax.servlet.http.HttpServletRequest;
import java.io.*;
import java.net.HttpURLConnection;
import java.net.URL;
import java.util.Map;

@Controller
public class GithubApiController {

    @GetMapping("/auth/github/callback")
    public String getCode(@RequestParam String code, RedirectAttributes redirectAttributes) throws IOException {

        URL url = new URL("https://github.com/login/oauth/access_token");

        HttpURLConnection conn = (HttpURLConnection) url.openConnection();
        conn.setDoInput(true);
        conn.setDoOutput(true);
        conn.setRequestMethod("POST");
        conn.setRequestProperty("Accept", "application/json");
        conn.setRequestProperty("User-Agent", "Mozilla/5.0 (Windows NT 10.0; Win64; x64) AppleWebKit/537.36 (KHTML, like Gecko) Chrome/96.0.4664.45 Safari/537.36");

        try (BufferedWriter bw = new BufferedWriter(new OutputStreamWriter(conn.getOutputStream()))) {
            bw.write("client_id=2fcb805d9535e1522d0b&client_secret=4395759df572eee27279148fa1a44c096bee1259&code=" + code);
            bw.flush();
        }

        int responseCode = conn.getResponseCode();

        String responseData = getResponse(conn, responseCode);

        conn.disconnect();

        System.out.println(responseData);

        access(responseData, redirectAttributes);
        return "index";
    }

    public void access(String response, RedirectAttributes redirectAttributes) throws IOException {

        /**
         * JSON 데이터를 처리하기 위해
         * Spring Boot에 기본적으로 포함되어 있는 Jackson 라이브러리를 사용함
         **/
        ObjectMapper objectMapper = new ObjectMapper();
        Map<String, String> map = objectMapper.readValue(response, Map.class);
        String access_token = map.get("access_token");

        URL url = new URL("https://api.github.com/user");
        HttpURLConnection conn = (HttpURLConnection) url.openConnection();
        conn.setRequestMethod("GET");
        conn.setRequestProperty("Accept", "application/json");
        conn.setRequestProperty("User-Agent", "Mozilla/5.0 (Windows NT 10.0; Win64; x64) AppleWebKit/537.36 (KHTML, like Gecko) Chrome/96.0.4664.45 Safari/537.36");
        conn.setRequestProperty("Authorization", "token " + access_token);

        int responseCode = conn.getResponseCode();

        String result = getResponse(conn, responseCode);

        conn.disconnect();

        System.out.println(result);
    }

    private String getResponse(HttpURLConnection conn, int responseCode) throws IOException {
        StringBuilder sb = new StringBuilder();
        if (responseCode == 200) {
            try (InputStream is = conn.getInputStream();
                 BufferedReader br = new BufferedReader(new InputStreamReader(is))) {
                for (String line = br.readLine(); line != null; line = br.readLine()) {
                    sb.append(line);
                }
            }
        }
        return sb.toString();
    }
}
이렇게 작성하고 다시 Github Login을 클릭하면 로그에 다음과 같은 정보가 출력될 것이다.

드디어 OAuth를 통해서 바라던 계정 정보를 가져왔다. 이를 브라우저로 출력해보자. 먼저 완료 페이지인 success.html을 resources/template 아래에 작성하자.
<!DOCTYPE html>
<html lang="en" xmlns:th="http://www.thymeleaf.org">
<head>
    <meta charset="UTF-8">
    <title>Title</title>
</head>
<body>
<h1>Success!</h1>
<div th:each="key: ${result.keySet()}">
    <span th:text="${key}"></span> = <span th:text="${result.get(key)}"></span>
</div>
</div>
</body>
</html>
그리고 값을 내려주는 코드를 GithubApiController에 작성하자. 아래는 완성된 GithubApiController의 전체 코드이다.
package com.example.githubapi;
import com.fasterxml.jackson.core.JsonProcessingException;
import com.fasterxml.jackson.databind.ObjectMapper;
import org.springframework.stereotype.Controller;
import org.springframework.ui.Model;
import org.springframework.web.bind.annotation.GetMapping;
import org.springframework.web.bind.annotation.RequestParam;
import org.springframework.web.servlet.mvc.support.RedirectAttributes;
import org.springframework.web.servlet.support.RequestContextUtils;
import javax.servlet.http.HttpServletRequest;
import java.io.*;
import java.net.HttpURLConnection;
import java.net.URL;
import java.util.Map;
@Controller
public class GithubApiController {
@GetMapping(value = "/success")
public String success(HttpServletRequest request, Model model) throws JsonProcessingException {
/**
* Redirect의 Flash 값을 다루려면 RequestContextUtils를 사용해야 한다.
**/
Map<String, ?> inputFlashMap = RequestContextUtils.getInputFlashMap(request);
String response = null;
if (inputFlashMap != null) {
response = (String) inputFlashMap.get("result");
}
ObjectMapper objectMapper = new ObjectMapper();
Map<String, String> result = objectMapper.readValue(response, Map.class);
model.addAttribute("result", result);
return "success";
}
@GetMapping("/auth/github/callback")
public String getCode(@RequestParam String code, RedirectAttributes redirectAttributes) throws IOException {
URL url = new URL("https://github.com/login/oauth/access_token");
HttpURLConnection conn = (HttpURLConnection) url.openConnection();
conn.setDoInput(true);
conn.setDoOutput(true);
conn.setRequestMethod("POST");
conn.setRequestProperty("Accept", "application/json");
conn.setRequestProperty("User-Agent", "Mozilla/5.0 (Windows NT 10.0; Win64; x64) AppleWebKit/537.36 (KHTML, like Gecko) Chrome/96.0.4664.45 Safari/537.36");
try (BufferedWriter bw = new BufferedWriter(new OutputStreamWriter(conn.getOutputStream()))) {
bw.write("client_id=2fcb805d9535e1522d0b&client_secret=4395759df572eee27279148fa1a44c096bee1259&code=" + code);
bw.flush();
}
int responseCode = conn.getResponseCode();
String responseData = getResponse(conn, responseCode);
conn.disconnect();
access(responseData, redirectAttributes);
return "redirect:/success";
}
public void access(String response, RedirectAttributes redirectAttributes) throws IOException {
ObjectMapper objectMapper = new ObjectMapper();
Map<String, String> map = objectMapper.readValue(response, Map.class);
String access_token = map.get("access_token");
URL url = new URL("https://api.github.com/user");
HttpURLConnection conn = (HttpURLConnection) url.openConnection();
conn.setRequestMethod("GET");
conn.setRequestProperty("Accept", "application/json");
conn.setRequestProperty("User-Agent", "Mozilla/5.0 (Windows NT 10.0; Win64; x64) AppleWebKit/537.36 (KHTML, like Gecko) Chrome/96.0.4664.45 Safari/537.36");
conn.setRequestProperty("Authorization", "token " + access_token);
int responseCode = conn.getResponseCode();
String result = getResponse(conn, responseCode);
conn.disconnect();
redirectAttributes.addFlashAttribute("result", result);
}
private String getResponse(HttpURLConnection conn, int responseCode) throws IOException {
StringBuilder sb = new StringBuilder();
if (responseCode == 200) {
try (InputStream is = conn.getInputStream();
BufferedReader br = new BufferedReader(new InputStreamReader(is))) {
for (String line = br.readLine(); line != null; line = br.readLine()) {
sb.append(line);
}
}
}
return sb.toString();
}
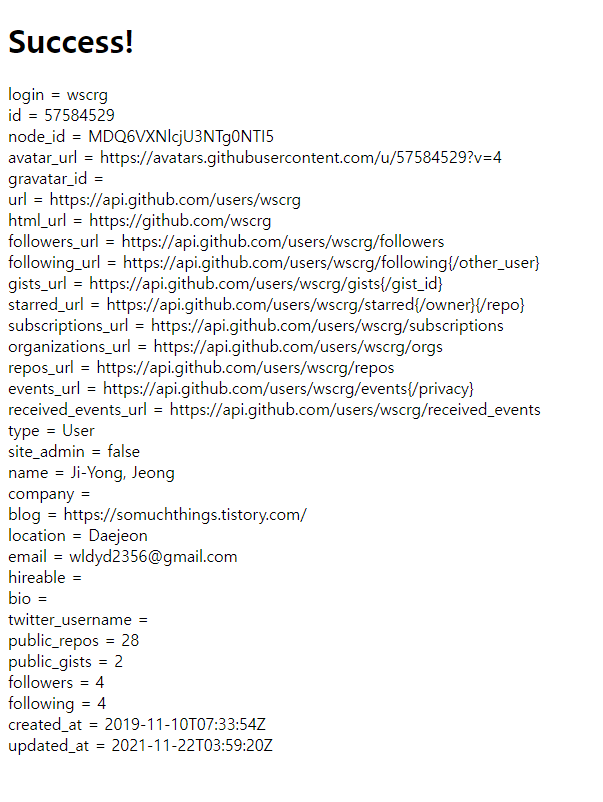
}이렇게 작성하고 다시 Github Login 을 클릭하면 다음과 같은 페이지가 나오는 것을 확인할 수 있다.
참고할 점은 위 코드는 RedirectAttribute의 addFlashAttribute를 사용했으므로 한 번 조회한 후에 데이터가 사라진다. 즉 새로고침을 하면 에러가 발생한다. 에러가 발생한다고 놀라지 말자. 이와 같이 한 이유는 addAttribute로 작성할 수도 있는데 이렇게 하면 URL에 데이터가 전부 들어가서 지저분해지기 때문이었다. 이런 부분은 각자가 원하는 대로 데이터를 다루어도 무방하다.
Wrap up
이번 토픽에서는 스프링 부트를 활용하여 Github OAuth를 라이브러리 없이 직접 사용해보았다. 지금은 단순히 공개된 유저 정보만을 가져온 것이므로 여기에서 추가 권한을 얻고 Github API에 접근하여 부가적인 작업을 할 수도 있을 것이다. 액세스 토큰을 저장하여 로그인 기능을 구현할 수도 있다. 그러나 이러한 과정을 직접 전부 구현하는 것은 상당히 복잡하다. 그래서 라이브러리를 쓰는 것이기도 하다. 그래도 이렇게 직접 Server to Server에서 HTTP를 통해 데이터 통신을 다루었으니 OAuth 라이브러리를 사용하더라도 어떤 식으로 동작하는지 조금이나마 깊게 알 수 있었다. 향후 프로젝트에서는 라이브러리를 활용하여 개발할 듯 하다(코드를 보다시피 상당히 복잡하다. 이는 예외처리도 하지 않은 것들이다...).
참고로 HttpURLConnection을 사용하면 몇 가지 단점이 존재한다고 한다.
- 응답코드가 4xx, 5xx라면 IOException이 발생한다.
- 쿠키 제어가 안된다.
- 타임아웃을 설정할 수 없다(?) 이 부분은 정확히 모르겠다.
이러한 문제가 있어 Apache 재단에서 만든 프로젝트가 HttpClient이다. 여기서 또 우리 스프링 개발자분들이 추상화를 하여 사용하기 편리하게 만들어준 라이브러리가 RestTemplate이다. 필자도 이 라이브러리는 아직 접해보지 않아 나중에 기회가 된다면 포스팅할 것이다.
'Spring > Boot' 카테고리의 다른 글
| [Spring] FactoryBean (0) | 2023.03.15 |
|---|---|
| [Spring Boot] @RequestParam vs @RequestPart (2) | 2022.03.08 |
| [Spring Boot] Spring OAuth 없이 Spring Boot로 Github OAuth 사용하기[1/2] (0) | 2021.11.22 |
| 2. IOC와 DI (0) | 2021.11.22 |
| 1. 객체지향 설계와 스프링 (0) | 2021.11.22 |